Time to Unifi

I received the Ubiquiti Unifi gear and got it racked and cabled. It consists of a Unifi Security Gateway Pro, a Unifi 24 port managed switch, and a Unifi AC Pro access point. I took the opportunity to finally get around to putting in cable management on the 19" telecom rack I inherited from somewhere.
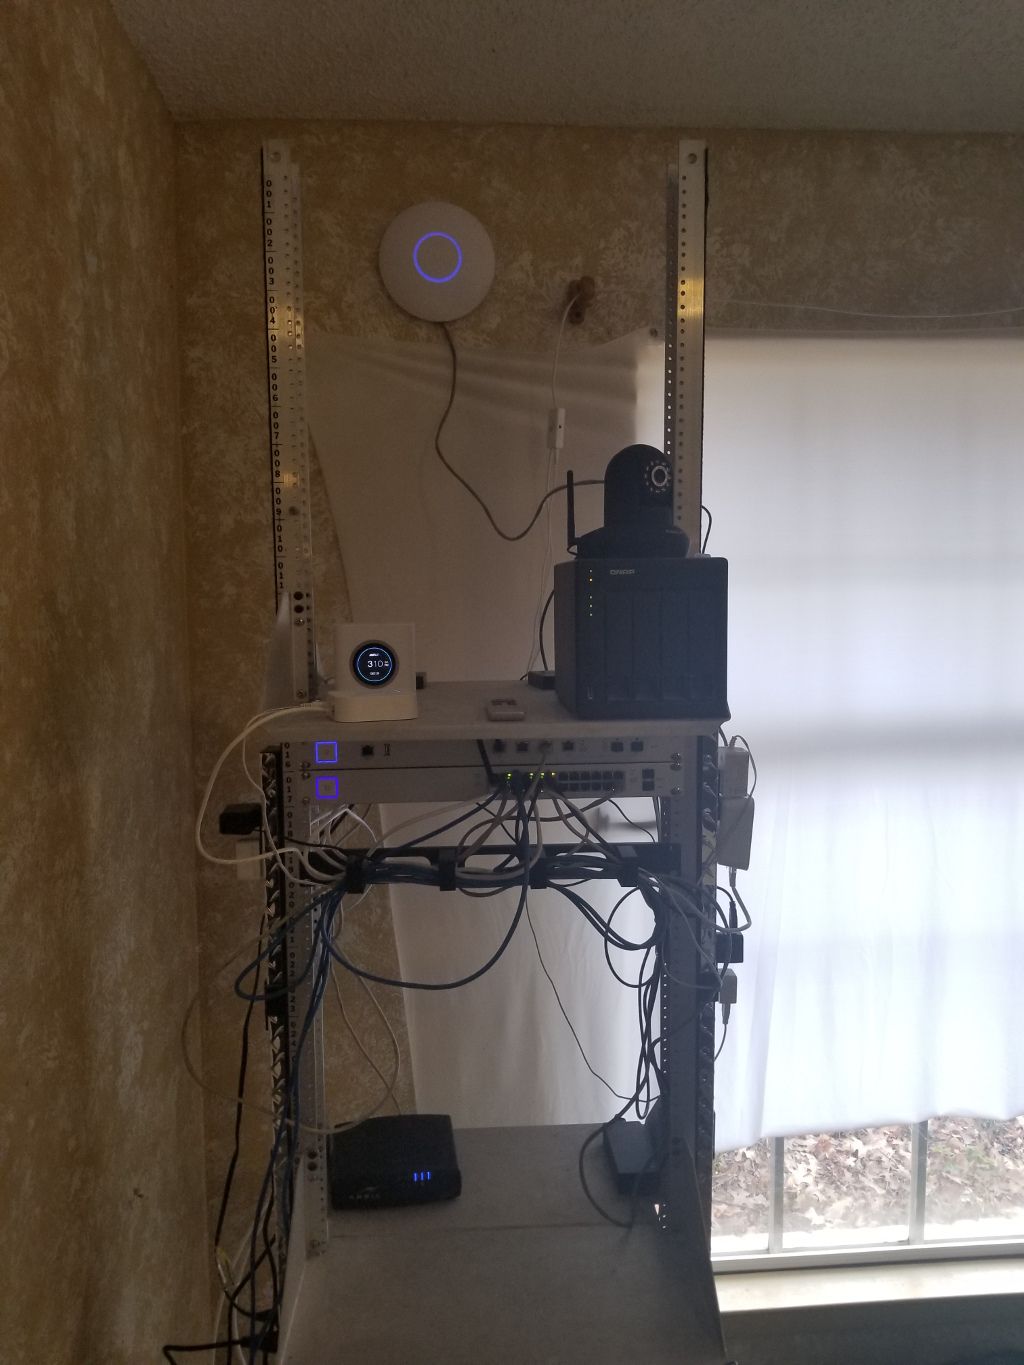
The Unifi system requires a Unifi controller in order to configure and manage it. It required that a device running the Unifi Controller be connected directly to the same layer 2 switch as the devices so they can be configured. It turned out to be a bit more of a challenge to bootstrap a working Unifi system than I thought it would.
I wanted to install the Unifi Controller as a Docker container on the QNAP NAS, but I was having trouble getting it to run without port conflicts since both the QNAP web interface and the Unifi controller both want to use port 8080. The next idea I had was to install it temporarily on my Linux desktop running Mint Cinnamon 19.3, but there were dependency problems with the packages. Ultimately, I ended up bringing in my Windows 10 laptop and connecting it directly to the switch to run the controller to get the intial setup done.
I setup up a new WiFi SSID for the new Unifi AP and connected the flaky Amplifi router in bridge mode so that all of the devices on the old SSID would be able to still communicate. Once I had the initial configuration set up and everything was working reasonably well, it was time to transition the configuration over to a Unifi controller that would be running all of the time. Since the Raspberry Pi 3B is running Hassio (https://www.home-assistant.io/hassio/) which has an official Unifi controller plug-in, I decided that would the best solution instead of figuring out how to reconfigure the ports on the QNAP. There were a few issues, but I was ultimately successful in getting everything ported over to the it’s new Controller.
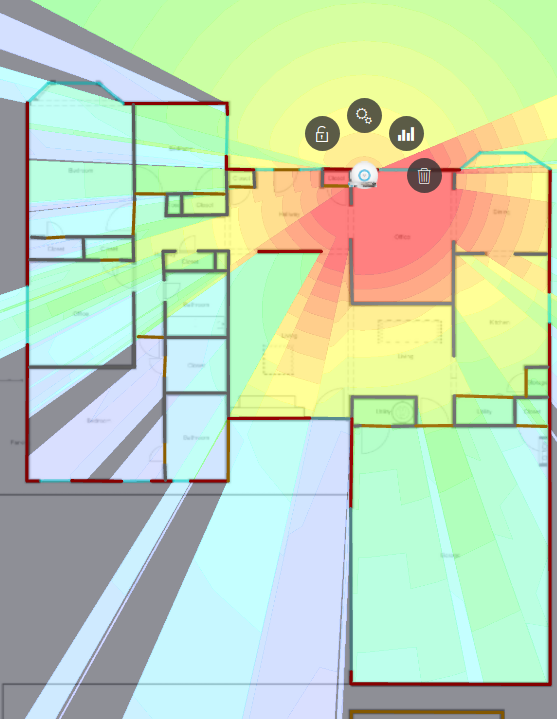
Next, I enlisted my wife in helping me create a fairly detailed floorplan of the house for use with Unifi to plan out the WiFi coverage as well as a future floorplan in the Home Assistant user interface. Floorplanner.com has a nifty tool that works well once you get used to it’s quirks. You do have to upgrade your project to premium to render anything but a potato image, but for $2.99 it was worth it.
The next phase will be to transition all of the devices connected to the old SSID over to the new Unifi AP. I have created 4 SSIDs and 4 corresponding VLANs to allow me manage the traffic to my devices and the Internet as well as which devices have access to other devices:
- The primary network will contain all primary devices such as phones, servers, tablets, laptops, PCs, and NAS storage.
- The IoT (Internet of Things) network will contain all devices which users will access and they need access to the Internet to function, but will be restricted from accessing the primary network. This will include Chromecast devices, Google Home, and Philip Hue hub.
- The NoT (Network of Things) will contain all devices that only require local control and do not rely on a cloud service to work such as IP cameras. They will not be able to initiate any connections, but will still be usable by users on the network.
- The final network will be a guest WiFi network in which devices will be to access only the Internet. They will not be able to connect to any other devices on the network.
This will take some time to get all of the devices moved over and the Home Assistant configuration updated since I had to hardcode IP addresses for most things when Home Assistant was running behind the nginx reverse proxy.